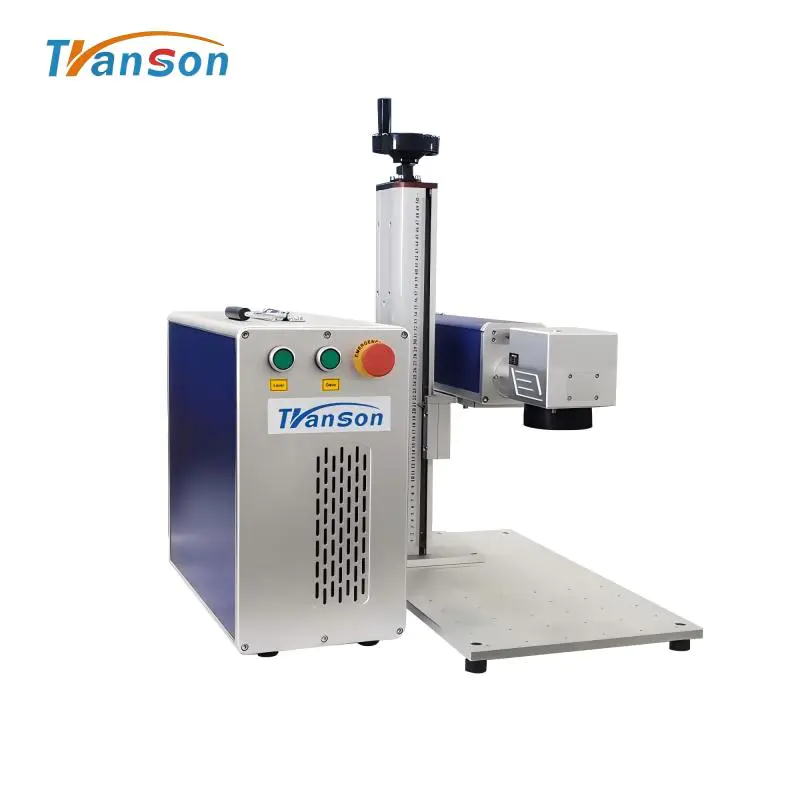
Transon Advertising CNC Router Machine For Metal Wood MDF PVC Engrave
Enclosed Type
build your own cnc machine
by:Transon
2020-12-07
In this tutorial I will show you how to make your own CNC machine.
To do this, you can purchase all the materials at your local distributor and e-store.
CNC is a computer-controlled machine that can be cut, engraved and engraved with a variety of materials.
We need a lot of material for this project, and then I just put all the material you need here, and in the other steps I tell you what material you need.
I will tell you the cost in Spain, but you may think that the price of the material in your country is different. 1.
I use DM playwood as wood for electronic structure. 2.
3 stepping motors. 1,5 gr/cm3.
Rotating tools like dremel4. Threaded rod5. Nuts and bolts. 6. Tools.
The stepping motor is a device that converts a series of electrical impulses into angular displacement, which means that it can advance several degrees (steps )
Depending on your order.
The stepping motor is a highly accurate motor because its shaft rotates from 1. 8º to 1.
8 ° this means giving 360 steps for 200.
This gives them incredible precision, and the transfer to CNC can make very small and delicate parts, as well as large parts.
The chip A4988 Pololu A4988 chip is some electronic driver used to control the stepping motor, used to determine the rotation direction and speed of these motors.
I think the engines will be connected to the Arduino and you are very clear, that is, you can find information about this motherboard if it is not in Ikkaro.
There is no need to know more about these chips, but if you want to deepen, you can be notified on the manufacturer\'s website, and this other link can download the data table of A4988.
I think it\'s a problem, I leave the price list here and what you will do here. 3 Chips A4988 -45 € (15 € each)Arduino UNO -€ 26 (
Now Leonardo spends 20 euros)
3 stepping motors
1 PCB 36 euro 3 per ebay-€ 5 Wood DM -30 € Milling -€ 50 (
My brand but 20 euros)
Screw bars and nuts€ 0. 50 ATX -20 € / 50 € (
I kicked an old computer)Total -€ 200 approx.
First, let\'s cut the plates that make up the main drawer of the machine that placed the electronic device, and the router will work the material.
The size of this drawer is fully customizable and each of you can choose the size based on the size of the part you want to form.
Please note that what we measure the drawer is the maximum area in which the machine can work.
All dimensions of the machine are customizable and can be used as a guide, but the size of the CNC depends on you.
Once we have built the foundation of the machine, we will give a \"track \"(
Can be seen in the photo above)
The spindle rolls forward and backward.
These guide plates are just two wooden strips that stick to both sides of the drawer.
Finally it should be like this: Regarding the guide rail we just placed, it rolls the main part of the machine, which moves in the direction of the axis X, in this head, the direction movement of the Y and Z axes will meet, but we will see a little bit below.
Now, we built a structure in the form of a target with two planks, as shown in the figure, but considering that the level on the table is related to the slot running the spindle wheel.
Here is the image of the structure: Below is the head structure with a strap that connects the two walls to maintain stability and allows the threaded rod to move through it. (
Don\'t be shocked by the cabling already explained in the next post to see if this is easy)
Our machine should have been formed so far.
Focus on the head, then where the router moves up and down.
This is the trickiest part of the whole process, and this piece must be perfect at runtime to prevent movement or pitching.
We took three boards and united together to form a box of three walls and the router was placed inside.
The box should have two covers, top and bottom, with a hole at the top that lets the motor shaft go through it and the bottom, with a hole that fits the threaded rod and sticks to its axis of rotation.
Inside this table, in the vertical direction, there must be three guide bars as an image so that the central piece moves along the z axis, but two router tables are recommended to accommodate two parts, instead of a pitch, because this can be transferred when work puts pressure on the tip of the router.
Once the whole structure is established, the stepping motor is placed.
The placement of the motor must be careful to avoid the tilt of these motors.
First make a hole in each table and pass through the motor shaft in the right way.
We introduce the shaft into the hole and attach the threaded rod to the hole.
I left the connection of the threaded rod you imagined, but my system is placed on the shaft, there is a metal taco for the tacos that hang the ceiling lights, they have a threaded entrance, just like the axis of meteis in the light slide bar in the thread.
These goods are sold in hardware stores.
Here, I leave the details of the joint rod engine: the screw bar on the x-axis uses cutting as a measure of the depth of the main drawer on the y-axis, compared to the head height, the measurement cut between the two side plates that hold the head and the Z axis is very short.
In this section, we will learn how to install the hardware environment needed to control the machine.
Material 3 chip A4988 Pololu robot 1 Arduino UNO 1 power supply ATX 1 fan (optional)
1 PCB 3 stepping motors (
Elegid fits your model)
As I explained in the first part of the tutorial Pololu A4988 chip, the welder is some driver driving the stepping motor, which means the signal sent by the Arduino-controlled engine.
The first thing we have to do is ask, we will design the PCB and I bought this at dx.
Com welded the assembly with her.
All electronics should, like in the picture, leave a picture of the PCB without a fan (
Sorry, I decided to use the wire instead of the track)
I left a photo of how they should go to all the contacts. The source we use is ATX (SOURCE Computer)
We can use it from chips to engines and routers.
I chose ATX because it is the cheapest and you can draw from an old computer.
There are several videos on youtube explaining the process in order to operate requiring jumpers.
The power supply has different voltage outputs that can connect all electronic devices to the same ATX, so only sockets on the wall can be used.
The voltage of the different power outputs shown is as follows: I left a description of the chip voltage and utility for each pin: VDD-
Power input chip 3.
3 V/5 v cable or orange red ATX. (
You can even choose between the two recommended voltages. 3 V)GND -
Fire Island a4988.
It is connected to the land of ATX, ATX black cable. VMOT -
Power input of stepping motor. 7 V / 36 V (
The voltage depends on the motor and must match the engine as this is the voltage that will be passed to the engine to move it. )GND -
Engine ground.
This must be connected to the land of A4988! ! ! . RESET -
Reset the chip to return the initial condition.
Switch between brackets
Goodbye, enable mode.
In this regard: it is important: in order to prevent the failure of the machine, all land must be connected, that is, the land of the A4988 must be connected to the land of the stepping motor and the Arduino.
While the chip is 5 v and the 12 v motor can be interconnected together, there is no problem with the voltage difference.
Yes, it works if the source is ATX, if it is dangerous for other sources, it has not been tested yet, so don\'t try it together if we are ATX.
Although the best option for me is ATX because it is the most economical and powerful option I have found.
Once all A4988 is plugged into the power supply and the motor is connected to A4988, the Arduino pulse cable can continue to be connected.
Use the digital output pin to control the A4988 via the ArduinoArduino control chip.
We use 3 digital inputs per chip (
Steps, directories, and resets)
Therefore, the Arduino needs 3 digital outputs.
STEP forward when arduino STEP sends pulse to motor.
If the DIR receives the signal, the motor will rotate clockwise instead.
The reset pin is used to reset the chip.
The pins we will use Arduino are: step pins 2, 4 and 7 of A4988 Pines 3, 5 and 6 for DIR pin chip Pines 9, 10, 11 for reset pins of our a4988, then I left a scheme chip connection: it can be seen using the DIR pin Arduino PWM output that the other pins only need to use the normal socket, so it is not mandatory to follow this scheme, instead, simply connect the pwm dir with something else you want.
Alternatively, we can install a fan or radiator on the chip because the A4988 chip will get hot and burn if the engine is over 1 amp.
This is not necessary for engines less than 1 amp.
First, I will explain the operation.
We use software design to make 2D drawings or 3D objects, using vectors such as Inkscape or 3D such as Blender in the case of 2D drawings.
Once we have what we want the machine to process, we have another program in the drawing that creates a code called G code with all the instructions for the machine to move to the correct coordinates, to create a graphic, tax or PCB or any object to model.
The third step is to send the code to the machine, that is, from your computer to the Arduino, which explains that the Arduino is carrying and moving the engine correctly due to the firmware.
Make a program called Txapu CNC and explain its operation.
Let\'s start with a tutorial explaining how to create G code.
Svg file previously created in Inkscape (.
Svg file creation does not matter in this tutorial youtube, but there are thousands of examples of how to draw using Inkscape)
Because you can Draw with Corel Draw or Adobe Flash or any program that allows vector design.
The program we use is PyCam, which is available to Windows and Linux for free.
This software allows us to spend all our 2D drawings and 3D Model G code very intuitively and simply, and has a 3D viewer for real-time
Time simulation of our model.
Here\'s a brief introduction to how to use: Pycam Download link :(
Run the first file for beginners download onlyopen .
Two programs must be installed, Inkscape and PstoeditLink Inkscape: to Pstoedit: first open a new file: then select the task tab and select the desired option, in my case, I want to tax the text displayed on the screen in the table, so I select \"concave\" and now chop \"generate toolpath\" wants to be done.
When everything is ready, go to the tool path tab, where \"export all\" and keep the generated G code where we want to save it.
Now we open the file with Txapu cnc g code.
Send now the CNC code you just created.
Doing Txapu CNC will use a program that only works for Linux, so as I said before, you should install it, I recommend Ubuntu, because it is a distribution of Linux that is easier to use and more followers.
Installing Ubuntu is simple and there are thousands of tutorials on Youtube.
Download the link of Txapu CNC you send the file Txapu CNC to start working with him.
In the last section we will see how to program the Arduino in order to explain the G code for sending the computer and moving the stepping motor.
Arduino has to carry firmware in it, as I mentioned, firmware acts as an interpreter for G
The code for this firmware can be downloaded from this link, and now we will see how to program to meet the needs of our machine, such as speed, measurement acceleration. . .
Go ahead and see how to program the micro-controller: Well, once downloaded the firmware I left on the link, you should open it with Arduino, which is downloaded from here and you guys haven\'t installed yet.
To open the downloaded firmware, open it from the Arduino IDE file using the following name: \"reprap _ new_firmware\" when opened, all other files will be opened automatically.
As you will see, the files are distributed in one tab.
We only modify the data in two of the tags, one of which is \"rstep percontroller\", where we modify the bitrate.
In the picture, we see yellow, which is the part that has to be changed, and if the value is different from 19200 to 19200, you have to change it.
Now, for the INIT tab, it will speed up the change, the steps of each step-by-step, and output the Arduino digital pins.
What does this mean by setting steps per mm?
, They are the necessary steps you should take step by step so that the speed of the screw rod engine reaches 1mm.
This is the characteristic of each rod, so you have to measure it.
Turn the rod and move 1mm for a few laps.
The part of the image you see in yellow must be changed.
The value to be set is the number of turns of the rod multiplied by 200 of the steps around the engine.
Note: 2 values are observed, one is the number of steps per inch and the other is the number of steps per millimeter.
Inches can be kept as they are because they don\'t affect the code.
Now let\'s take a look at the feed rate, the \"speed\" of the A4988 alimetaran engine \".
It depends on the adjustment of the engine, the motor and engine need 100 need 1000, in my case, the engine needs between 90 and 250, depending on the speed at which the motor rotates.
How to check the feed rate of the engine is correct?
Using CNC Txapu, you can use manual control to test the rotating motor, if the engine makes noise like a jet, the feed speed in Txapu CNC changes slowly, I bajadlo, you have experienced a lot on the feeder! ! ! .
It\'s not enough if the engine sounds like a ratchet, I upload it! ! ! .
In this part of chip programming, we will assign Arduino digital pins to the pins of the a4988.
All of this is simple, just write the Arduino pin number that will be assigned to the chip pin.
For example, the x_step_pin is the pin A4988 chip STEP that controls the motor shaft X, and then assigns the Arduino pin number corresponding to this pin, for example 4, but can assign what you want, remember, the PWD pin is used for the DIR pin of the a4988.
If we use a extruder, the extruder will assign contacts to the extruder in the last few lines of code, because this tutorial is intended for the use of milling machines, but the user can also decide whether to place the extruder instead of the router, so this is part of the code, so define the pin that corresponds to the extruder. (
As I said before, if you want to add).
Custom message
Related Products