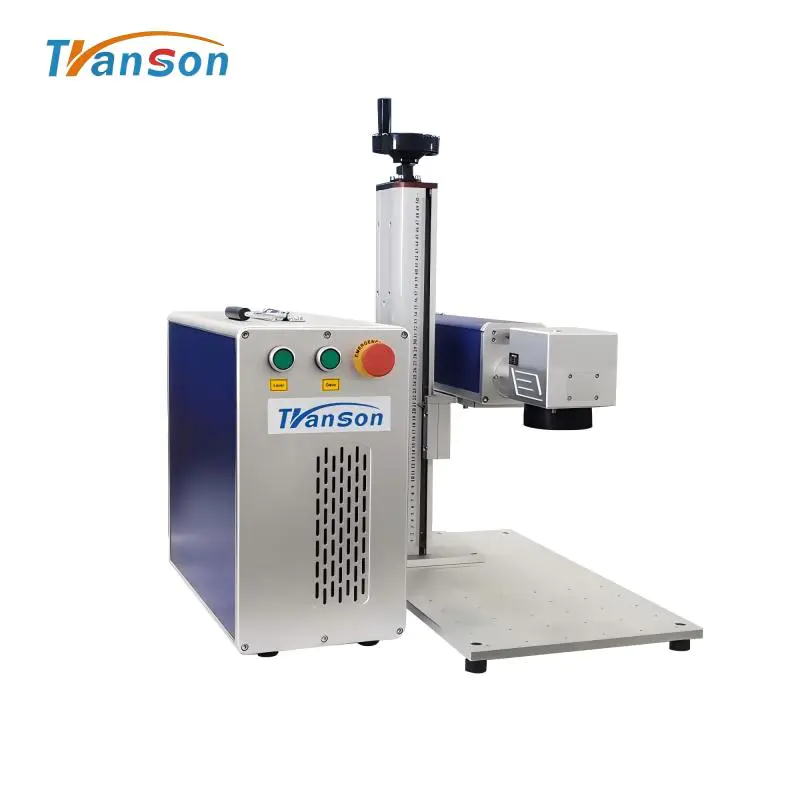
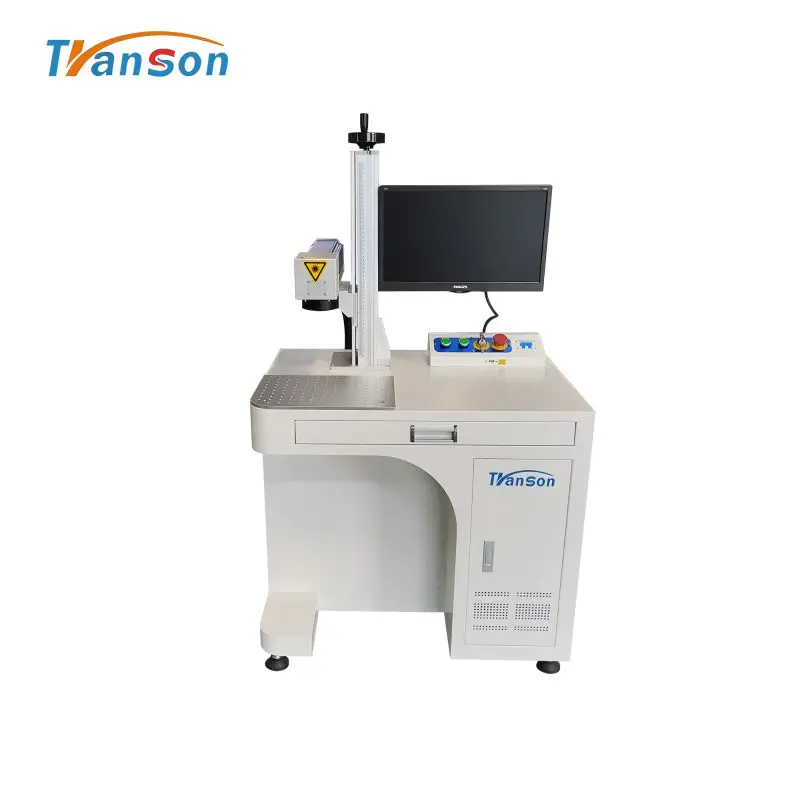
Transon 500mm Width Rust Removal Fiber Laser Cleaner 6000W Laser Cleaning Machine for Metal Rust Painting Clean
Enclosed Type
build a foamcore cnc machine
by:Transon
2020-12-07
Visual Glossary of tools required to build Foamcore CNC is attached to this step as a PDF.
The list of visual materials needed to build Foamcore CNC is attached as a PDF to this step.
And a sample of McMaster.
Attach the Carr order to provide better details for the parts. You will need:-1/2\" Foamcore-
Or pencil-C-
Through the rules, the top plate is a key structural part of the Foamcore cnc xy platform.
By the end of this step, you will mark and prepare the cutting top plate.
Please refer to the attached PDF cut mode when performing this step.
This step will guide you to mark 1/2 \"foamcore according to the cutting pattern.
Technology 1: Mark a square. 1)
Mark 14-along the lower edge of foamcore-1/2\". 2)
Similarly, Mark 14-along the left edge of foamcore-1/2\". 3)
Align the ruler perpendicular to the left edge of the board to the vertical mark you just created. Now mark 14-
12 \"enter the center of the board.
Just create a tick and don\'t draw a line.
We are preparing to draw the first vertical line. 4)
Now, run the ruler from the scale created by the child
Step 1, use the scale you just created.
Draw a vertical line connecting the two scales. 5)
To be sure, the new vertical line is at 14-1/2. \"6)
Now the scale in the connector
Step 2, mark the nearest scale with a horizontal line.
You just drew a 14-12\" square!
The reason for so many steps is to make sure it ends up square instead of tilting.
Technology 2: drawing construction drawings.
All dimensions in the cut pattern are called \"coordinate\" dimensions, which means they are all relative to the common zero point.
Use these dimensions to first mark the scale along the perimeter of the square.
For each dimension, you should mark the scale on the opposite side.
This will make the line you draw perpendicular to the edge of the square.
When you\'re done, your layout should look like the second and final picture of this step.
You will use these technologies throughout the structure. You will need:-Olfa Knife-
The goal of cutting the board this step is to cut along the layout you created in step 3.
The shape of the outside becomes the top plate, and the corner of the middle edge becomes the workbench of the machine.
Note: Be very careful when using the Olfa knife.
Cutting the 1/2 \"foamcore requires exposing quite a few blades, so please don\'t get your hands out of the way.
Make sure that the cutting board is placed completely under the layout.
We will put the square inside first (
Which table will it become)
, Then separate the layout from the larger material plate, and finally remove the corner of the top plate.
Technology 1: cutting the inner profile. 1)
Stick out the blade of the Olfa knife, revealing about an inch and a half. 2)
Touch the tip of the blade to a corner of the profile and apply enough pressure to break through the upper layer of the foamcore. 3)
Cut in shallow depth along the layout line. 4)
Now, put the knife on the starting point again, then put the knife down until you feel the cutting pad. 5)
Make sure to keep the hand held by foamcore away from the blade.
I put it on the blade. 6)
Line cut that is completely inserted along the blade.
I kept the blade at a very shallow angle and I found this to give me a cleaner cut. 7)
Stop cutting when the blade intersects the end of the cutting line. 8)
Flip the blade and insert it into the end point of the last cut.
This will completely cut the layout line through the material.
What you want to avoid is trying to cut with a blade perpendicular to the job. 9)
Repeat this for the other three edges of the inner square. 10)
Flip the board and cut the blade anywhere without breaking through. 11)
Carefully press the center part out and put it aside.
Now cut along the perimeter of the layout and remove it from the remaining foamcore pages.
Finally, cut out the corner of the top plate.
It may be difficult to keep your hands away from the blade, so be very careful and make mistakes in doing multiple cuts with less force to get better control. You will need:-1/2\" Foamcore-
Or pencil-C-
Using the same layout technique as step 3 through the rules, lay out the back and bottom plates according to the attached PDF.
Because we depend on the factory-
Draw vertical lines on the square edge of Foamcore sheet, which will help save the factory-
As shown in the figure, cut corners by laying out the plates adjacent to the back and bottom.
There are several tips for cutting the back panel. The complex-
The find slot in the center of the panel can be divided into three separate rectangles.
First cut out the largest vertical slot, then cut out the smaller horizontal slot, and finally cut out the connecting material.
The two small gaps at the top of the panel allow the steel cable to pass through.
Because the part is very large and relatively square, it can be safely placed on the bottom edge and cut the slot from the top.
Once you have cut the vertical side of each notch, go through the surface of the paper on each side and unplug the notch. This is vanilla.
Make sure to show this on 3/16 \"foamcore!
Note: you will lay six legs instead of four (
As shown in the figure).
The attached PDF has been corrected.
Some suggestions: before cropping the overall layout from the remaining foamcore, cut all the long edges of the legs first.
Then separate the legs from the remaining foamcore along their shorter ends.
You may not be able to cut a small gap like the back panel (i. e.
Put them on the table)
Because the legs are very thin, you don\'t want to hold them under the blade with your hands.
I suggest putting them flat on the mat.
Remove the gap using the same technology as the back panel.
Reminder: you will cut 6 legs in total.
I made a photography mistake :-)
You need: In this step, you will prepare the delrin strip, which will provide strength and durability in key areas of Foamcore CNC.
Attach the cutting pattern as PDF.
Part 1: laminated tape with double layers
The first step is to peel off with a double layer laminated section of delrin
Adhesive tape.
This is a volume. to-
Literally, scroll \"the program.
I execute this program on the table to help keep the volume aligned with the double volume
Tape attached to delrin.
When you go, press the strap on delrin.
Gently pressing the tape helps to put it on the table and prevents the tape from drifting up.
If this does happen, you can tilt the delrin bar and try to track it against the table.
You want to end up with a laminated band of about 200 inch, and there is no good way to measure its length when it\'s all wrapped up.
What I did was measure the diameter of the laminated coil formed and multiply it by pi to determine how many coils I need to create to finally get at least 200 inch of the coil.
Part 2: The beauty of separating the laminated stripe delrin is that all you need to do is score with Olfa and it can easily snap accurately along your grading line.
Gently rate the strip after lamination, separating it from the rest of the unlaminated delrin.
Part 3: cutting all
Width layout is classified as full-
Width or split width.
This part involves the completewidth strips.
You need a square reference edge before you start cutting the strip to length and width.
I finished this with a ruler as a square.
Keep the ruler along the length of the strip and mark it along the short edge of the ruler to create a line perpendicular to the delrin strip.
Marking on the back of the double knife-
For better visibility, paste the tape (
Not in Front of delrin).
Then score along this line and capture the edge of a square.
Now, Mark along the Strip according to the layout, draw a vertical line using the short edge of the ruler.
Then score and rest.
Part IV: cutting segmentation
The width layout part of the layout needs to split the width.
For many of them, you won\'t split the entire width in half until you apply the strip later.
To mark half of the tape, use the ruler to see-
Pass to the first mark and then score at half along its width.
Now Mark the strip and divide it into the length specified in the cutting pattern.
You can split the edge bars now, but keep the longer ones full
Until you use the width of them.
This step will handle the lamination of the delrin strip on the top plate.
In order to avoid confusion, the strips are divided into three piles: the large top strip, the small top strip and the Edge strip of the top plate.
Refer to the location guide PDFs.
\"Outside\" receives large strips and \"inside\" receives small strips.
Before starting, mark the inside and outside surface of the top plate with the word \"BACK\" along the same edge.
The placement pattern on the inside and outside surfaces must have a common \"back of the machine\" edge.
The outer surface is laminated first.
To laminate a whole piece, remove the backing and drop it down according to the placement guide.
Use your finger to align the corners of the strip with the corresponding corners of the top plate and press down.
Let the fingers press on the edge of the top plate and on the edge of the strip, and keep them aligned as you press down gradually along the Strip.
Once the strip is completely applied, rub fairly hard along the Strip to set the double-stick tape (it is pressure-activated. )
To laminate the split bar, follow the same procedure :-
Follow the line you scored in Step 9 to separate the straps along the middle. -
You will leave a minimum clearance of 1/16 between the two straps.
You can estimate the gap through your eyes, but be consistent. -
Make sure the factory-
The edges of the cut face the gap with each other.
This will make it easier to maintain a consistent gap.
Now laminate the inner surface.
You will notice that the stripes are offset from the edges.
This is to make the top plate stick to the back plate and legs.
Use the placement pattern as a guide to mark these offsets on the inner surface of the back panel. DOUBLE-
Check if both modes share a common \"back of the machine\" edge.
Finally, laminate the edges.
If you haven\'t broken the top plate edge strip yet and apply it to the inside edge of the top plate corner.
Using the same technique as step 10 and the attached placement guide, laminate the delrin strip on the back panel.
Refer to the attached guide for structural assembly.
Let\'s stick our narrow legs to the back plate first.
The position of the leg must be shown in the attached PDF, which will require drawing two lines on the back panel 1-1
1/2 per side\"
For each leg, run a glue along the inside of the newly drawn line and glue a narrow leg so that it is located inside the line.
While the glue is still hot, slide the leg so that it is flush with the top and bottom of the back plate and align with the line (on the inside -i. e.
Toward the center of the back panel. )
Make sure the small notch on the leg is on the same side as the notch on the back panel.
Stick the remaining narrow legs to the wide legs to form two Ls.
Pay attention to the gap on the same side.
Install each leg on the bottom plate by first running a Drop of glue water along the position they will sit on the bottom plate, and then pressing the leg on the bottom plate.
Use similar technology to install the back plate on the bottom plate.
Use green polyester tape to temporarily tape the top plate to the back plate and front leg.
Then flip the machine and run a glue bead along the joints inside, be careful not to put any glue into the gap.
You can also run a bead along the external joint with the back panel.
Remove the polyester tape once the rubber cover.
Using the techniques in the previous steps, lay out and cut the table struts according to the attached schema.
The only tricky part is the round hole.
Try cutting at least partially along the hole, then using a knife to cut X in the hole and pry up the top layer of paper.
Then try cutting again.
Once you have been through in a few places, you can flip the part and insert the rest of the hole from the back.
Once the pillar is cut, press with nylon bushing so that the pillar becomes a mirror image of each other (i. e.
Press left on one pillar and right on the other. )
Then glue around the joint between the bushing and the pillar.
Draw two parallel lines along the machine\'s Workbench (
This is the removal center of the top board), each 1-
3/4 \"from two opposite edges \".
Run the aluminum bar through the bushing of the pillar.
This will keep them aligned during bonding.
Place the table of the machine along the edge of the sheet so that the line you just drew is perpendicular to the edge.
Run the glue bead on the inside of the two lines and press the pillar down on the glue.
Before the glue is set, make sure that the pillar is relative to the line inside (i. e.
Toward the center of the part. )
The straight edge of the pillar should be aligned along the length of the workbench.
You need to cut the following quantity and length of wood pins: quantity 12: 1/2 \"diameter x 1\" longitudinal quantity 2: 1/4 \"diameter x 3\" longitudinal quantity 1: A few tips for the 1/4 \"diameter x 2\" cold Tower :-
For pins with smaller diameter, it is helpful to just pull the saw instead of push the saw.
If you push and pull, the larger diameter cuts faster. -
Don\'t worry about the width of the saw.
Try to center the cut on each line
The exact length is not important. -
You may want to strategically find the trash can below the action. -
If you have a clip and a real Saw (
Not a knife)
Work will go faster.
This step is a hodgepodge of various tasks related to the table and its anti-spring mechanism.
First cut the assembly, cut the Assembly drawn in the connected cutting pattern.
Please note that some of them are delrin, some are foamcore, and some are not laminated with double layersstick adhesive.
Connect DELRIN to struts next, connect the laminated 1/2 \"x1\" delrin strip to the side of struts, as shown in the figure.
These straps should sit a little bit before the gap on either side of each pillar starts.
The purpose of these strips is to act as the carrying surface of the wood pin, which will be installed inside the wood pin.
Use polyester tape and attach 3/16 \"x2\" delrin strips as shown in the figure.
They should be glued to the edge of the pillar with adhesive tape, which can only be stuck under the notch.
These elasticity will retain the stakes we will insert later.
Connect the component to 1/2 \"x 1-
1/4 \"foamcore strip and 3/16\" x 1-
As shown in the figure, 1/4 \"delrin strips to the back panel.
The two foamcore strips should span the horizontal slot at the top center of the inner back panel.
On the outside, one side should have a foamcore strip across that slot, and on the other side there should be a thin delrin ribbon.
These wooden strips will keep a 2 \"stake in the gap, and the stake will hold the back spring again.
Finally, we will prepare the counterspring component.
Cut wire rope about 6 \"with wire rope cutter \".
Circle around the nylon bushing once and tie the knot.
Then apply a glue around the wire and fix it on the bushing.
Pass the other end through the hole in the constant force spring so that there is about an inch of rope between the spring and the bushing.
Wrap some Polyester tape around the wire.
Then clamp the end of the constant force spring with two delrin strips, as shown in the figure.
This will prevent the spring from twisting as it extends-
Wait a few steps for everything to become more meaningful.
Cut out the components in the connected cutting pattern.
When you cut the six small ones down, make sure to mark the word \"UP\" on each side, because the gap is not completely symmetrical, but it is difficult to visually judge which side it is biased.
Laminate the back of the larger plate with two double plates
Tape centered on 1-1/8\" hole.
Then cut the tape out of the hole.
As shown in the figure, apply tape on the uninterrupted long edge of the smaller plate.
You can save the tape by laminating two tapes at a time and then separating them later.
Tape the gap piece to a larger board as shown in the figure.
As shown in the figure, the small delrin sheet is applied to the inner edge of the larger incision.
You can also apply glue to the joints inside.
Carefully, apply a small piece of strong glue on the shaft of the stepping motor.
You have to take this glue away from the shaft into the motor.
Immediately press the metal gasket to the shaft with a twist motion, then slide until the shaft appears from the other end of the gasket.
I recommend keeping the motor at a slightly downward angle to prevent the glue from flowing the shaft up into the motor.
Cut a piece of 3 \"electronic tape and wrap it around half the end of the aluminum shaft.
You only want about 3/8 of the width of the tape along the length of the shaft.
This creates something for a cup and then you can put the gasket in it.
Wrap the electrical tape tightly around the gasket and shaft.
Apply another 3 \"tapes on the first tape.
The wiring tape acts as a flexible coupler between the motor and the aluminum shaft.
Now is a good time to peel the wires before you install them on the machine.
These wires will be connected to any controller you decide to use for the machine (
Unfortunately, this note is not covered. )
As shown, install a motor on the edge of the top plate and remove the backing on the adhesive around the hole.
Slide the aluminum shaft into the hole so that the shaft is in contact with the delrin strip on the top plate.
The purpose of this operation is to tape the motor onto the bracket so that it is aligned with the top plate at the correct height.
Before pushing the motor into the adhesive, try to align the shaft horizontally with the center of the hole.
Repeat this process for all three motors.
Although they will run on different axes, the spacing between all three is the same.
The tight wire wrapped around the aluminum shaft ensures that the shaft is forced to roll instead of sliding.
The wire is tightened with half of the hose clips that have been broken.
The first step in the preparation of the hose fixture is to prepare the hose fixture: 1)
Use a flat head screwdriver to completely loosen all six hose clamps.
You might want to expand a little bit. 2)
With pliers, in 3-
4 holes of cylindrical gear.
Then bend and loosen the clip at the clip point to fatigue the steel bar until it breaks.
Prepare 6 wire ropes with a length of 28.
5 \"wiring of AXES1
Pass one end of the wire through several holes on the worm
Gear side of hose fixture.
Despite this picture, I would suggest feeding the wire from the bottom of the clip to the top through the first loop, and then through the second loop and then through the first loop.
Returning the cable back in this way will prevent the cable from loosening. 2)
As shown in the figure, place an axis from the front to the back of the machine, placed on the outer surface of the roof. 3)
Now is a good time to install two nylon bushing on the shaft.
Look forward to this in the picture.
The key point is that the flange faces the outside. 4)
Feeding wires as shown in the figure:)
From the inside of the machine to the outside, through the incision of the right front leg. b)
Go through the groove in the split delrin strip under the aluminum shaft. c)
As shown in the figure, wrap the wire around the shaft once. d)
Pass the wire back to the inside of the machine through the cut of the left front leg. 5)
Pass the wire through the first loop at the free hose clamp end, but do not double it. 6)
The two edges of the top plate, the rope wound together from the inside to the outside, will be reinforced with a 1 \"wooden pin.
Place these pins in place and then tighten the cables to determine how many cables are delivered through the free hose clamp end.
When the hose clip is relaxed, you should have enough cables to reach both ends of it. 7)
At this point, pass the cable through the free end of the hose fixture and trim it with the cutter. 8)
Pass the free end of the hose fixture through the worm gear as if you were tightening it.
Tighten the clip using a flat head screwdriver.
You want to apply enough tension to make the wire tight but can\'t straighten out the hose fixture completely.
Repeat this step for the second axis. The shaft needs to be installed under the top plate and the motor is located on the right side of the machine.
Polyester tape is now used to support the free end of the shaft.
Before the end of the tape, be sure to put on two nylon bushing with flange facing out.
As shown in the figure, insert the aluminum shaft with the mounting stepping motor into one of the pillars.
Then slide the bushing connected to the constant force spring onto the shaft.
Finally slide the shaft over the bush in the second pillar.
Tilt the table back so that the pillar goes through the back panel and put 3 \"wood pins\" into the gap of the pillar.
Lift up the constant force spring until it sits in a horizontal slot in the center of the top of the back panel and locks in place with 2 \"stakes.
Use polyester tape to fix the aluminum shaft on the back plate near the motor.
When you put on the cables and stretch them, this will keep it still.
Install the cable and tighten it.
Bring back the hose clip on the motor side to prevent it from entering the motor holder.
If the Z table is not flat, you can cut a 3/16 \"foamcore\" and another 10 1/2 \"square\" foamcore to create a new horizontal table.
Put down the thin strips, the new table on top, slide the thin strips to the front of the machine until the new table looks flat.
Then stick the strap in place and stick the new table to the strap and the old table.
The shuttle connects the upper and lower axes of the XY platform together.
We will make a very simple shuttle bus that you can modify later. Cut out a 3-
Foamcore\'s 1/2 \"square and marks two vertical lines, one on each side, at its center.
Near the end of each line, the top sheet was scored with an Olfa knife to remove a sample of approximately 1/2 \"x 5/8\" long, centered on one line.
Peel the paper back and reveal the foam below.
This is to provide some flexibility for casing sinking.
Apply a small amount of glue to the top of the bushing on the lower aluminum shaft, then press the square on the bushing so that they can rest in the curved groove.
Avoid applying any glue to the aluminum shaft.
Slide the bushing above to the top of the shuttle and apply glue to their sides to stick them to the shuttle.
When the glue is cured, gently squeeze the two aluminum axes together.
Remove the polyester tape that supports the free end of the guide rail and try to move the shuttle bus!
What you attach to the machine is up to you!
I have successfully connected the pen before, with the machine and the tomato sauce extruder (
Displayed on the old version of the machine. )
Unfortunately, the build controller is out of scope for this structure.
However, the stepping motor current used by this machine is very low and it is single polarity, which means that various DIY and commercial controllers can be used.
Other items that can control this machine include :-
Makerbot Electronics you need the motherboard and three Drive boards for about $205 in total
This is an open
Source code interpreter. -
Make your robot controller based on EMC2 based on anything from uln2003.
Google search brings a lot of information.
There is even an official example of Arduino that demonstrates how to control the stepping motor.
Hope I will keep a low profile one day soon
Cost controller for low cost
The cost nature of this machine.
Custom message
Related Products